When you think about transforming a room, most people picture new paint or furniture – but sometimes, the real magic happens underfoot or on your walls. Tile installation can dramatically change the look and feel of a space, whether it’s your kitchen, bathroom, or outdoor patio. And the good news? You don’t need to be a professional to tackle DIY tile projects. With the right guidance, planning, and tools, home tiling can be an exciting, rewarding adventure.
At Eco Seattle Cleaners, we’ve helped countless homeowners make smart, beautiful choices for their homes. In this guide, we’ll walk you through everything you need to know – from choosing tiles to mastering grout tips – so you can confidently handle your next project.
Choosing the Right Tiles for Your Home
Choosing tiles is more than picking a pretty pattern – it’s about combining beauty, durability, and functionality. Ceramic tiles are a favorite because they’re versatile, durable, and easy to clean. Porcelain tiles handle high-traffic areas well, while natural stone brings elegance to bathrooms, entryways, or outdoor patios.
When selecting tiles, consider:
- Durability: Will it withstand daily wear and tear?
- Water resistance: Essential for bathrooms, kitchens, and outdoor areas.
- Style and design: Color, texture, and pattern should complement your existing décor.
- Room function: Some tiles are better suited for walls, others for flooring.
Once you know which tile fits your style and needs, planning the layout becomes a lot easier. Don’t forget: even small choices, like grout color, can dramatically affect the final look. Home tiling is as much about design as it is about installation.
Preparing Your Space for DIY Tile Installation
Preparation is the foundation of a successful tile project. Skipping this step is a common mistake among first-time DIYers. Begin by thoroughly cleaning the surface, leveling uneven floors, and removing any old flooring that could interfere with adhesion. A flat, clean surface ensures your tiles stay put for years.
Next, gather your tools. Essential items include:
- Trowel for applying adhesive
- Tile spacers to maintain consistent gaps
- Level to keep tiles straight
- Tile cutter for precise edges
Safety is just as important as technique. Wear protective eyewear, gloves, and knee pads if needed. A well-prepared space not only makes installation smoother but also reduces the chances of mistakes and ensures professional-looking results.
Step-by-Step DIY Tile Installation
Now comes the fun part: actually laying the tiles. Here’s a practical, expert-approved approach:
- Plan the layout – Start by finding the room’s center and marking your grid lines. A well-planned layout avoids awkward cuts at the edges and ensures symmetry.
- Apply adhesive – Spread adhesive evenly with a notched trowel. Consistency is key; too much or too little can affect tile adhesion.
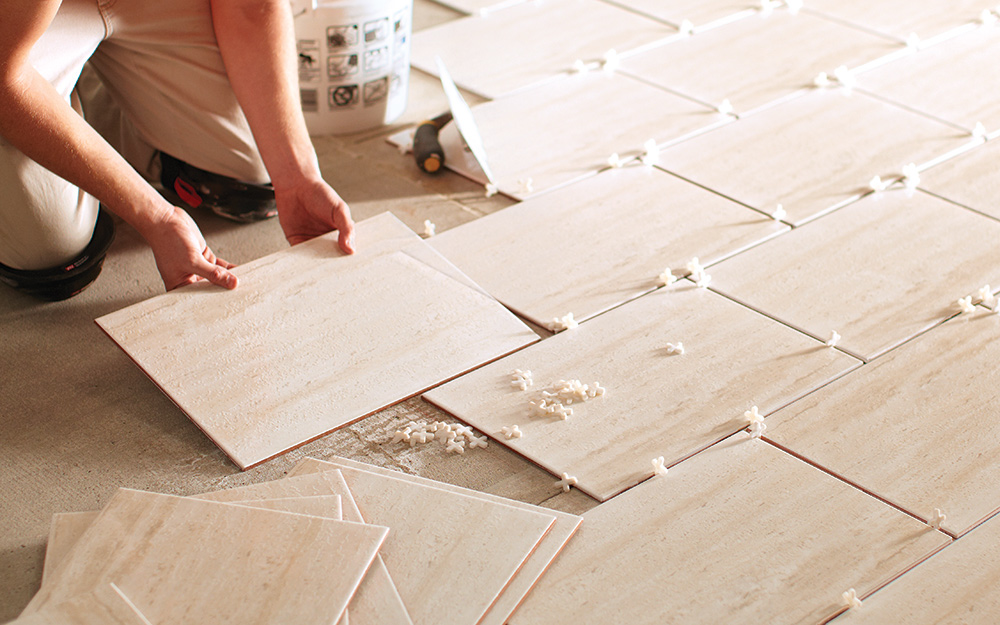
- Place the tiles – Press each tile into the adhesive, using spacers to maintain even gaps. Step back periodically to ensure alignment.
- Cut tiles for edges and corners – Measure carefully and cut with a tile cutter. Accuracy here is crucial for a polished finish.
- Grout the tiles – Once adhesive sets, fill gaps with grout and wipe away excess with a damp sponge. For the best results, follow professional grout tips, including sealing grout to prevent staining.
Through careful planning and attention to detail, even first-time DIYers can achieve results that look professional.
Common Mistakes to Avoid
Even experienced DIYers encounter pitfalls. Watch out for these:
- Uneven spacing – can make the floor look chaotic and unprofessional.
- Insufficient adhesive – tiles may shift or lift over time.
- Ignoring expansion gaps – can cause tiles to crack as the floor naturally expands and contracts.
- Skipping grout sealing – leaves grout prone to staining and discoloration.
Recognizing potential mistakes before you start is half the battle in home tiling projects.
Maintenance and Care Tips
A well-installed tile floor or wall deserves proper care. Here’s how to keep your tiles looking pristine:
- Clean regularly using mild detergents.
- Avoid harsh chemicals that can erode grout or dull tiles.
- Seal grout annually to prevent stains and discoloration.
- Promptly repair any cracks or loose tiles to avoid bigger problems.
For more detailed cleaning and maintenance guidance, check out HGTV Tile Cleaning Tips.
With proper care, your investment in ceramic tiles and home tiling will continue to pay off for years.
Tackling a DIY tile installation may seem intimidating at first, but with careful planning, the right tools, and expert guidance, it can be both achievable and rewarding. From choosing the perfect ceramic tiles to mastering grout techniques and layout planning, every step brings you closer to a home that is beautiful, functional, and uniquely yours.
Start your next home tiling project with confidence, and let Eco Seattle Cleaners guide you every step of the way. Your space deserves to shine, and with a little patience and know-how, you can transform blank walls and floors into stunning surfaces you’ll enjoy every day.